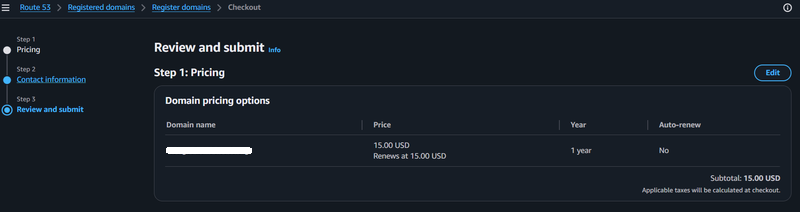
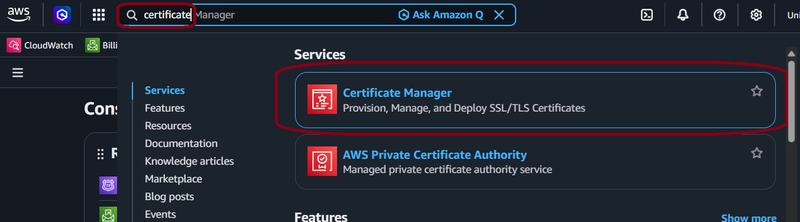
Step 31: Now that you have registered a domain, you need to get a public certificate.
This is required because we are using CloudFront to enable HTTPS traffic. In the main
management console, type the word "Certificate" into the search box. You should see an option
appear for "Certificate Manager." Click that option. Note that these steps assume you
purchased the domain name in Route 53 and did not "import" it from another registrar.
If you imported it, you will need to create a Hosted Zone and modify the domain servers.
Doing this work is beyond the scope of this guide.
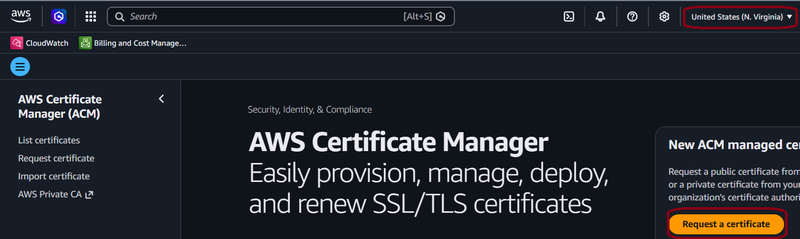
Step 32: On the Certificate Management homepage, you should see an option to "Request a
Certificate" on the right hand side. Click the "Request a Certificate" button. Note: make
sure you are in the US East (N. Virginia) Region, this is required since we are using the
certificate for CloudFront HTTPS.
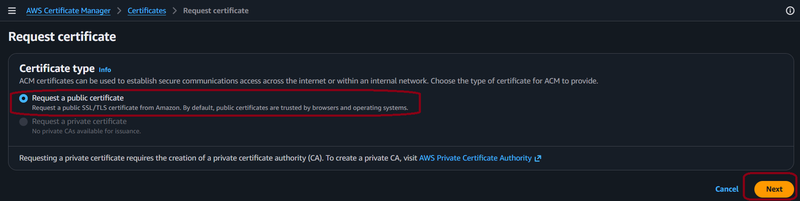
Step 33: Ensure the "Request a public certificate" option is checked. Click the
"Next" button.
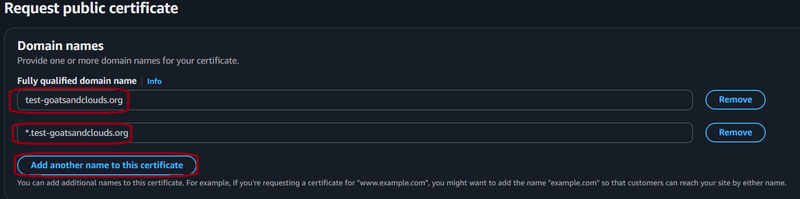
Step 34: Enter the fully qualified domain name you registered in the previous step.
You should also click the "Add another name to this certificate" button and add an entry in the
format of *.yourdomainname so that you have a wildcard certificate for all the subdomains.
For the author, that means adding two entries, "test-goatsandclouds.org"
and "*.test-goatsandclouds.org."
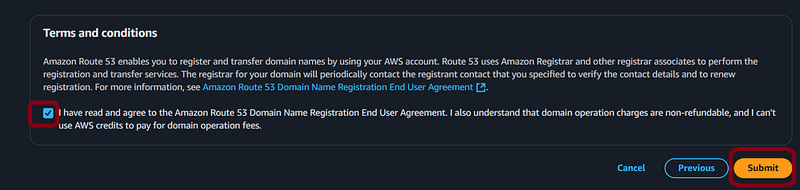
Step 35: Fill out the rest of the form. The author left the defaults as follows:
allow export = disable export, validation method = DNS Validation, Key algorithm = RSA 2048.
For Tags, click the "Add new tag" button and copy the key / value information from the tag
you created earlier. Click the "Request" button once done.

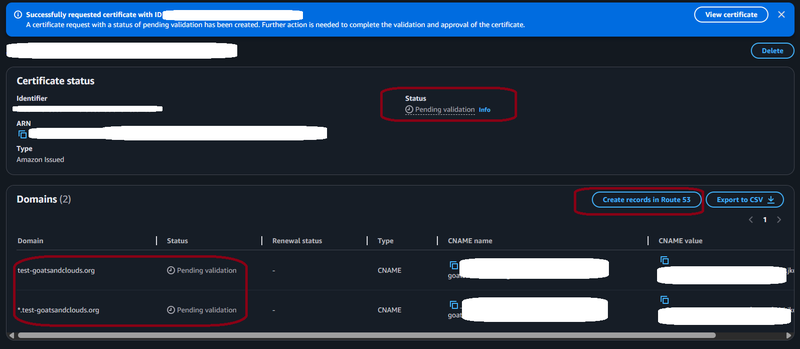
Step 36: You should be taken to a screen which has a message indicating your certificate
is in "pending validation." Note that the table at the bottom should contain both the domains
you requested. In the case of the author, this includes test-goatsandclouds.org and
*.test-goatsandclouds.org. Click the "Create records in Route 53" button.
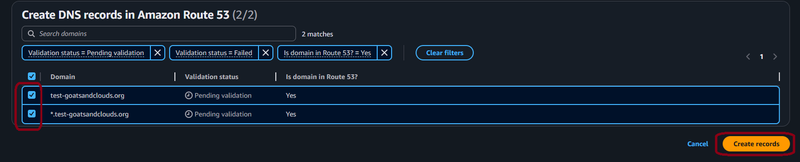
Step 37: You should be taken to a screen where both records are listed and checked.
If not, ensure they are both checked, then click the "Create records" button.
Step 38: You should see a message indicating that the DNS records were created.

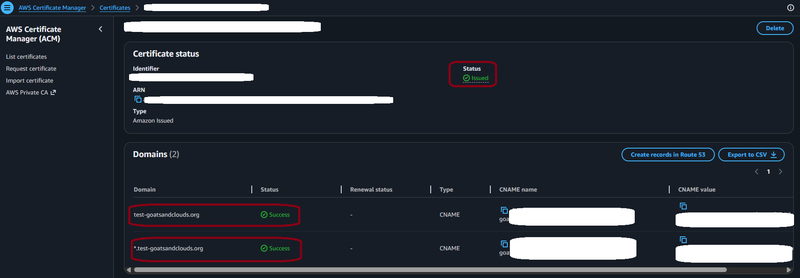
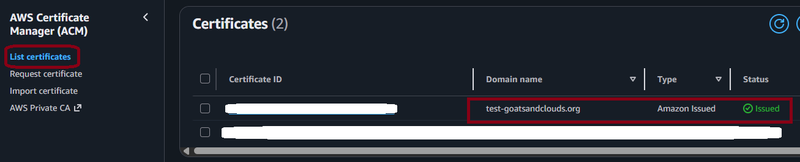
Step 39: It may take some time, but if you click the "List certificates" option, the
certificate should show as "Issued." Note the author has hidden anoterh certificate that is
not relevant to this guide.
Step 40: You can click on the Certificate ID link to see both certificates with a
"Success" status.