This step by step guide will cover how to set up a new AWS Account. The results of this
guide will be used by future step by step guides to deploy various architectural solutions
using AWS services. This guide is designed for a first time user and may not be of interest
to experienced users. Note the author has hidden certain fields such as email addesses,
account names, codes and credentials, etc. for security purposes using colored boxes.
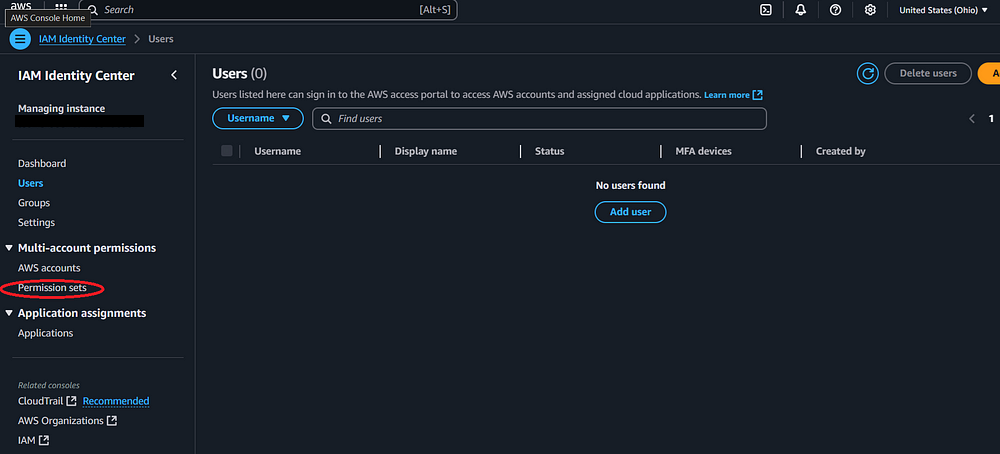
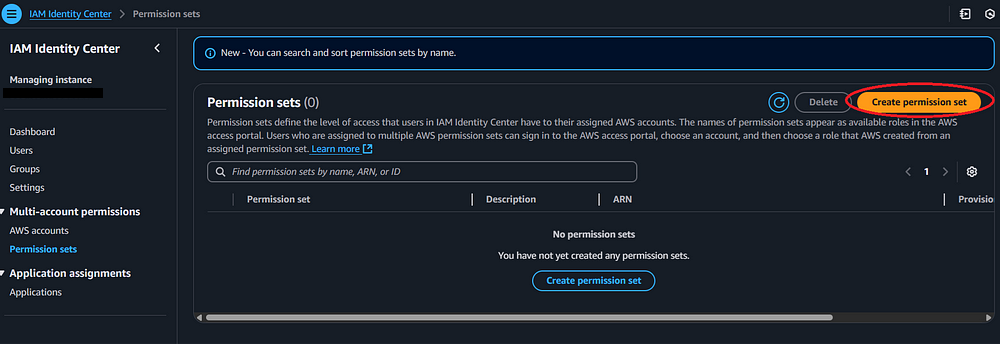
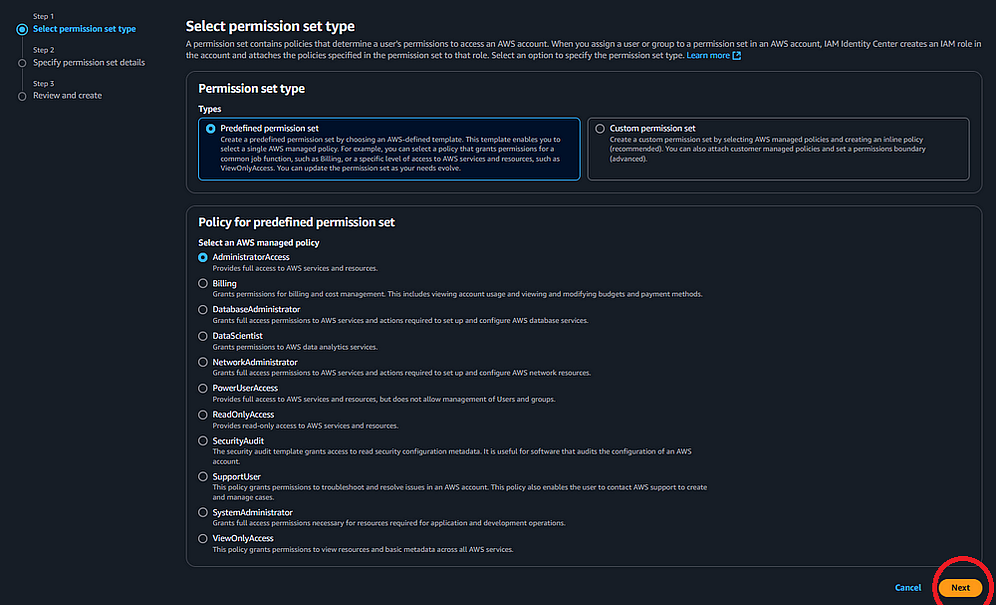
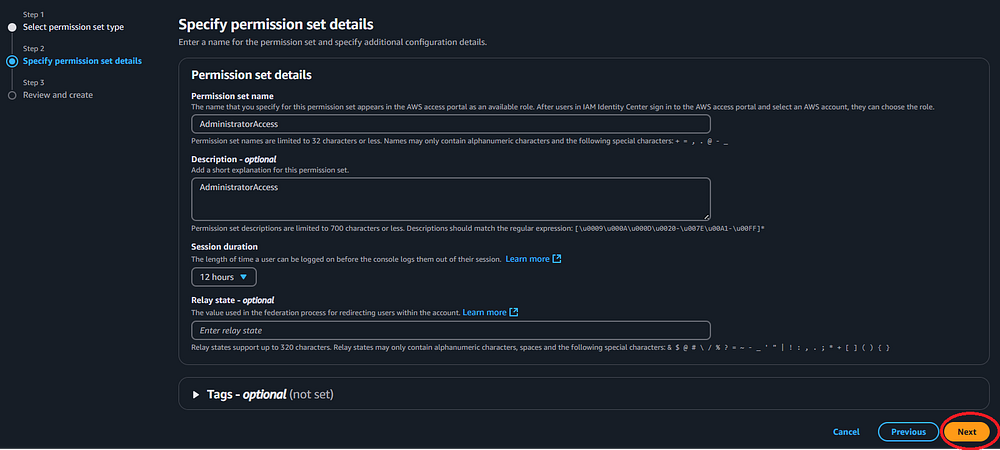
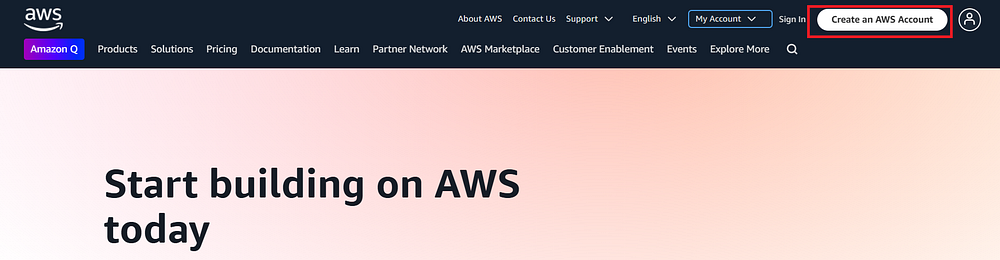
Step 1: Navigate to aws.amazon.com and click the
"Create an AWS Account" button on the top right of the screen. Note that if the button says
"Sign In to the Console," it is likely you have previously logged into an existing AWS account
on the device you are using.
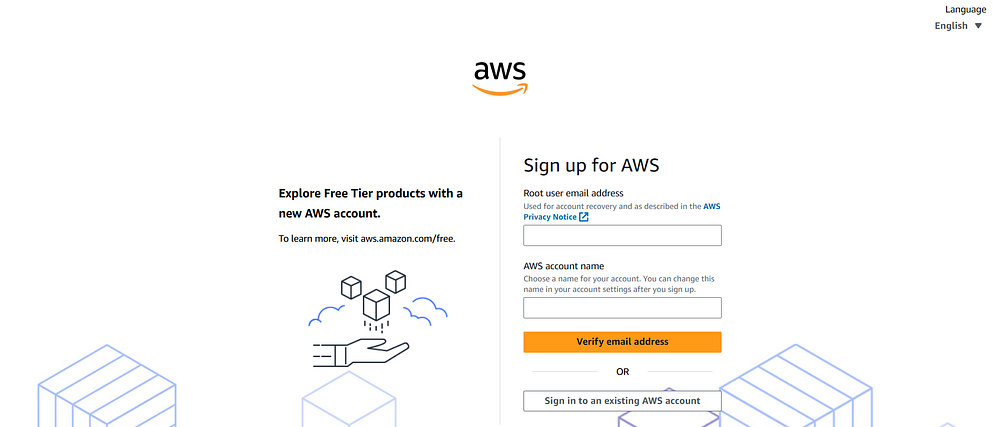
Step 2: You should be presented with a screen that allows you to enter the email address
for your account and an AWS account name. Enter your email address in the "Root user email
address" field. In the "AWS account name" field, enter a name that describes your account.
This could be the name of a project or a business you plan to build on AWS, or something else
that will allow you to identify what this account is for. Once you enter the information,
click the "Verify email address" button.
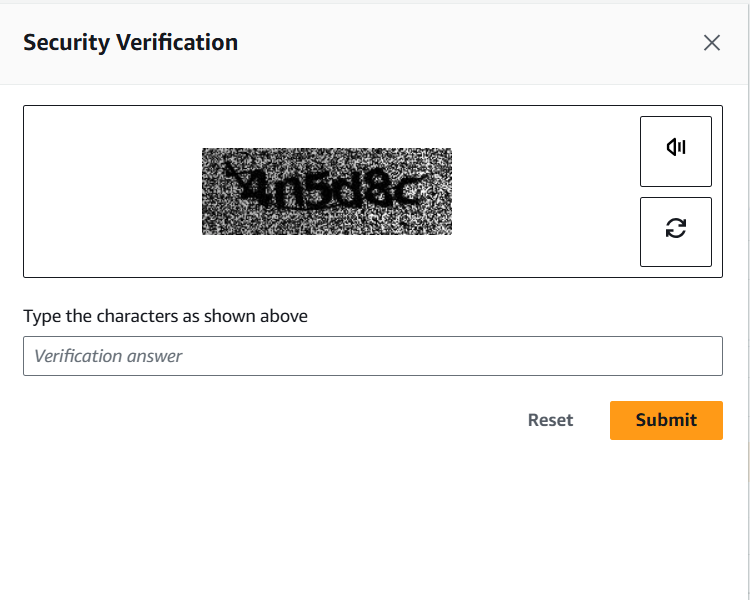
Step 3: You may be presented with a security verification prompt, though this does not
always happen. Complete it to continue and click "Submit."
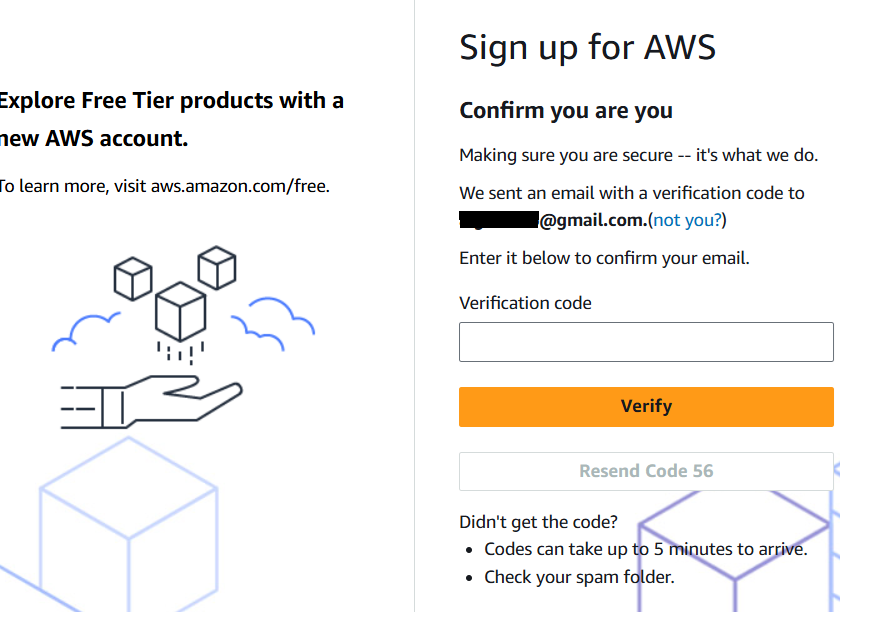
Step 4: You should receive a prompt asking you to confirm a code which was sent to the
email you used to sign up. Get that code from your email, enter it, and click "Verify."
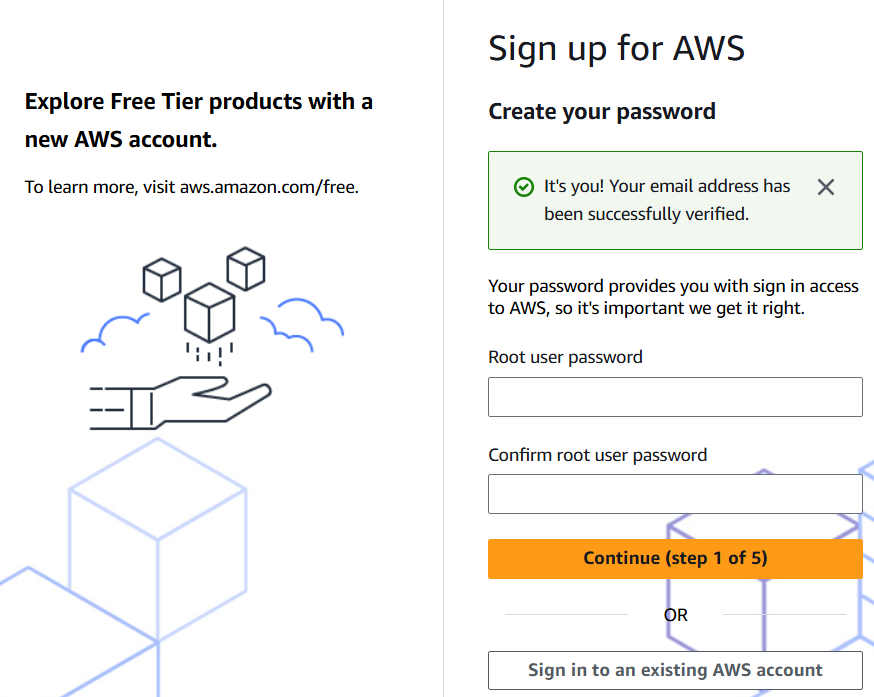
Step 5: If the verification is successful, you should see a "It's you" message in a
green box. You can now enter a root password and click "Continue (step 1 of 5)" to proceed.
Step 6: Select your account plan (free or paid). The author selected "Choose paid plan"
because there are services that will be used in future guides which are not free.
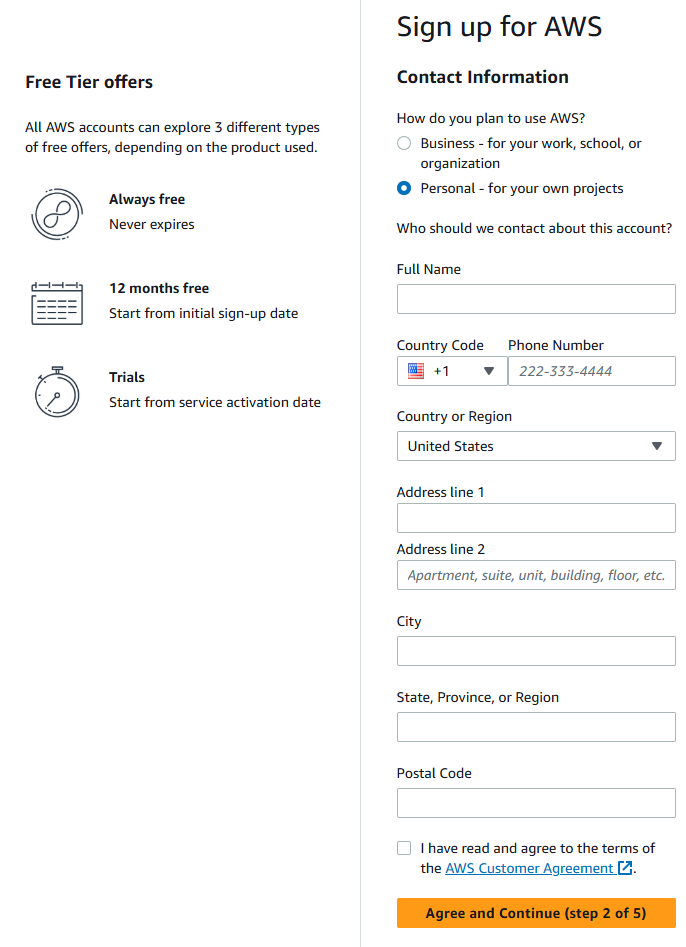
Step 7: Enter the reuqired information into the form. Note that you need to check the
"I have read and agree to the terms of the AWS Customer Agreement" box. Once done, click the
"Agree and Continue (step 2 of 5)" button.
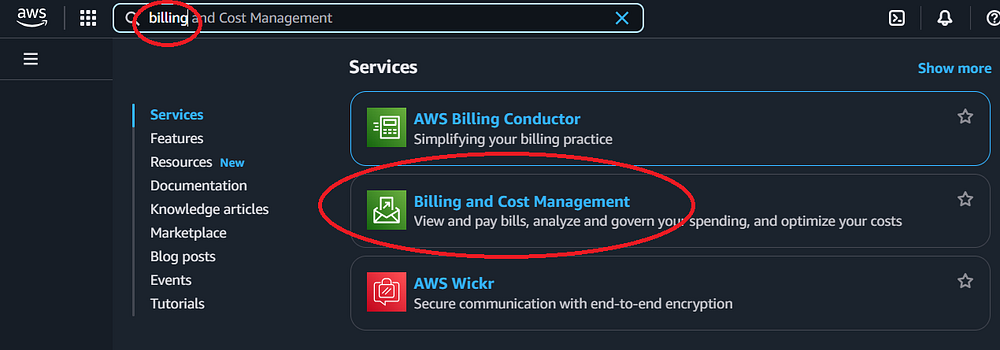
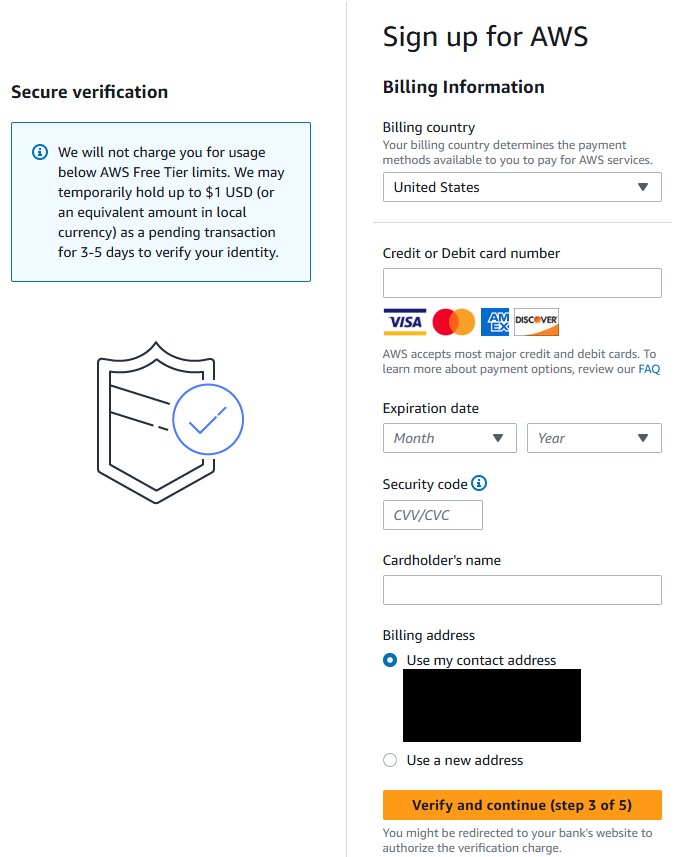
Step 8: Enter the requested billing information. Note that depending on which AWS Services
you use, there may be charges. This article includes steps (below) to set up billing alarms.
Once done, click the "Continue (step 3 of 5)" button.
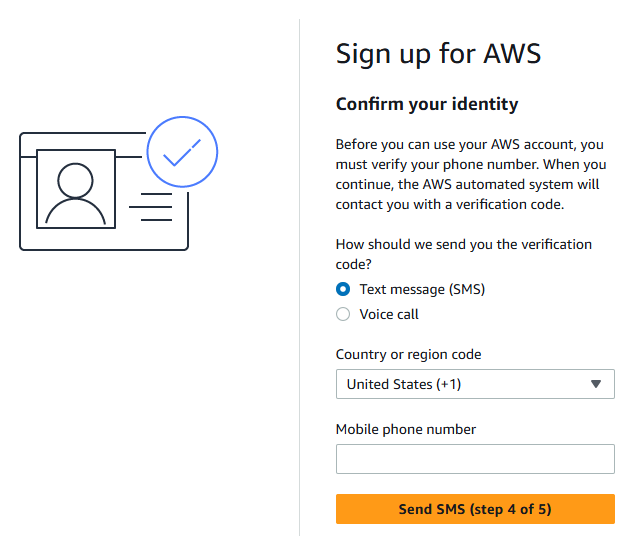
Step 9: You will be prompted to enter a phone number to confirm your identity, either via
text or phone call. Enter your phone number and choose either option. For the purposes of this
guide, we are using SMS verification. Once you enter your phone number, click the
"Send SMS (step 4 of 5)" button.
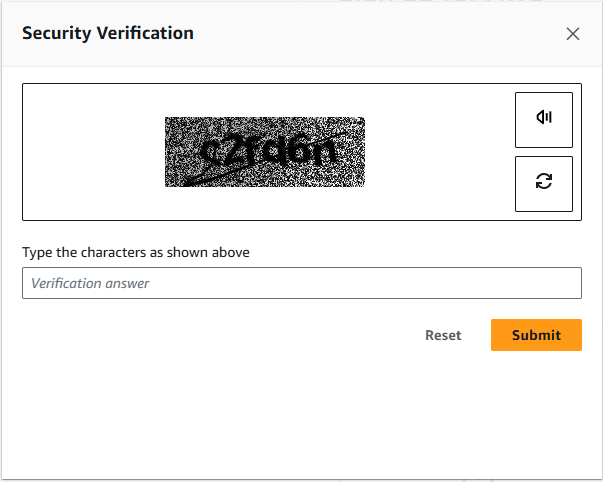
Step 10: You may be prompted for another security verification. Complete the verification
and click "Submit."
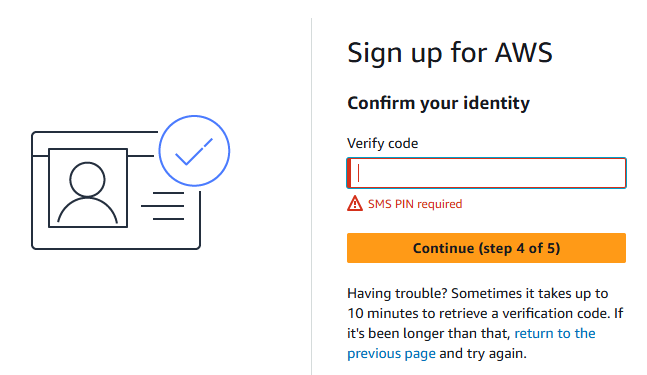
Step 11: Check your phone (it may take a few minutes for the text to arrive) and enter
the verification code sent to you. Click the "Continue (step 4 of 5)" button to proceed.
Step 12: If you have previously set up an AWS Account with your address, phone number,
or billing information, you may not be eligible for AWS credits and may see the message below.
Click "Confirm" to proceed.
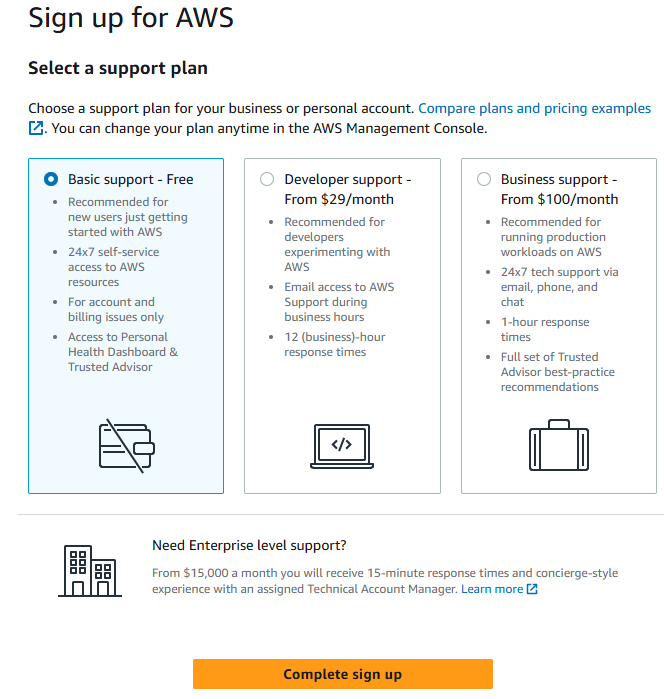
Step 13: Choose a support plan. If you are just starting out with AWS, you may want
to start with the "Basic support - Free" plan and, as you add services / learn about AWS,
modify your plan as your needs evolve. Click the "Complete sign up (step 5 of 5)" button
to complete the sign up process.
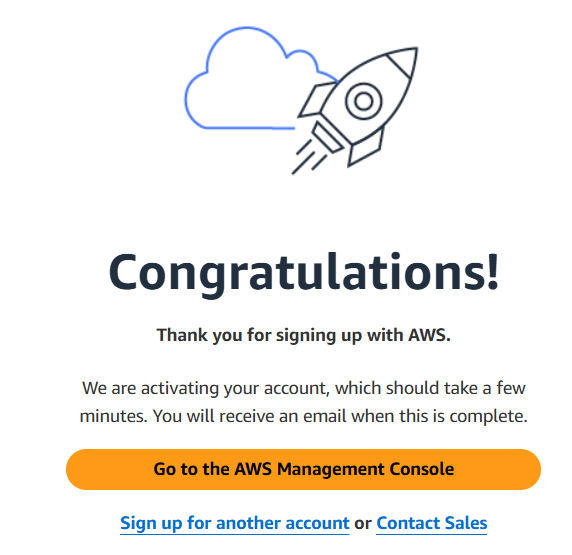
Step 14: You should see a "Setting up your AWS account" screen similar to the one below.
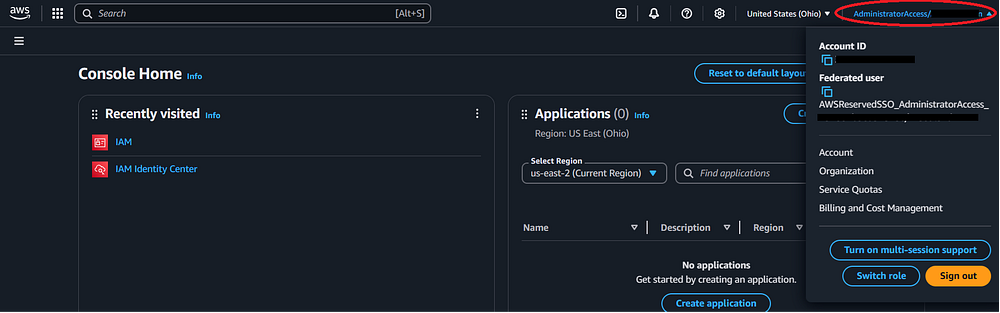
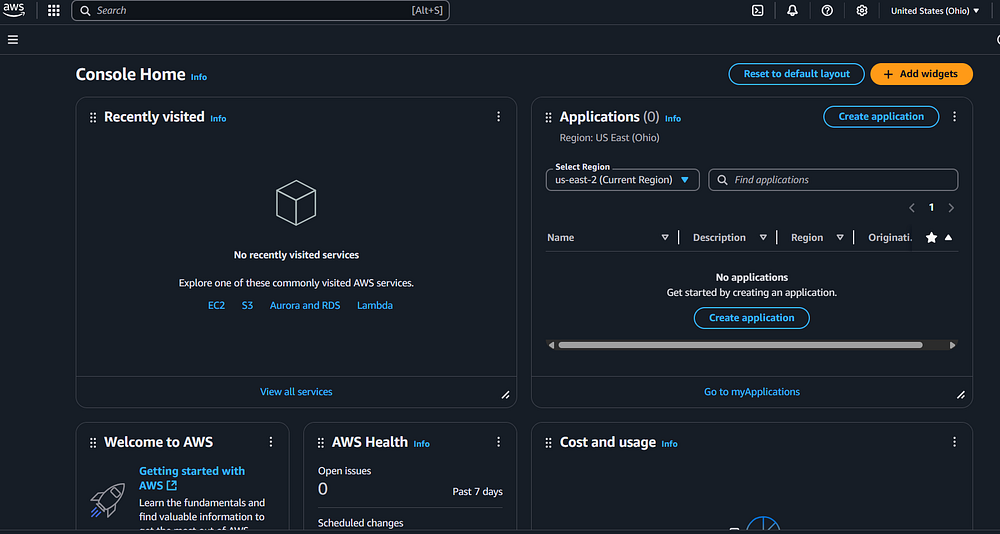
Step 15: Once the setup is completed, you should be taken directly to the AWS console,
please see the screenshot below. You can click the various "Next" buttons that come up to learn
more about the console. There are several sections in the AWS console, and navigating may take
time. This tutorial will not cover all the functions and options, those are documented in the
AWS
Documentation repository.
The author recommends that first time AWS users take time to navigate the AWS console and
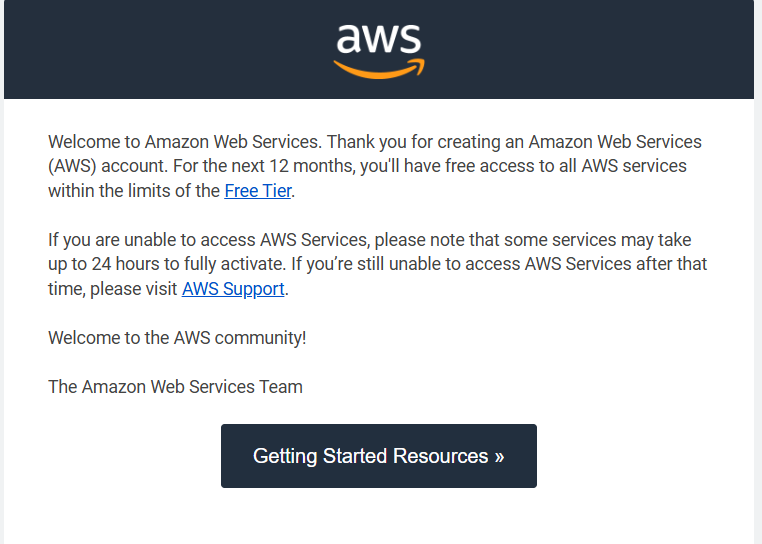
familiarize themselves with the various options before proceeding. Note that you may receive
multiple emails welcoming you to AWS. Please read these emails, they provide additional
information about your account tier, costs, services, support level, etc.
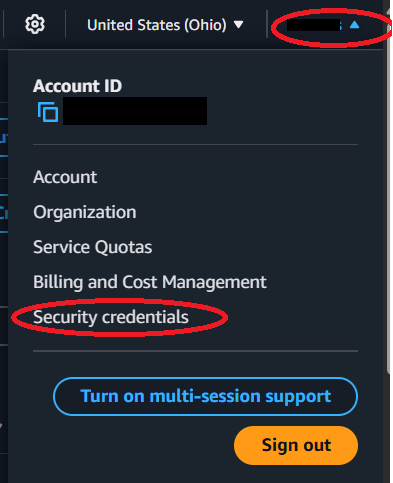
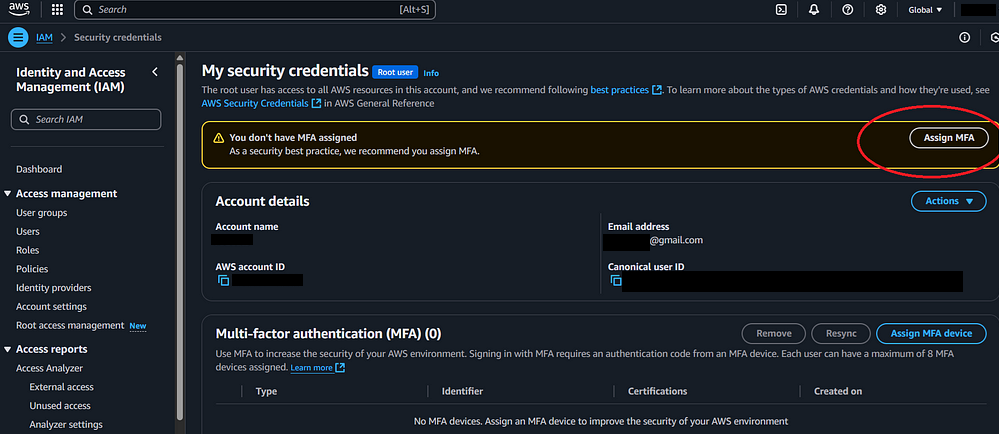
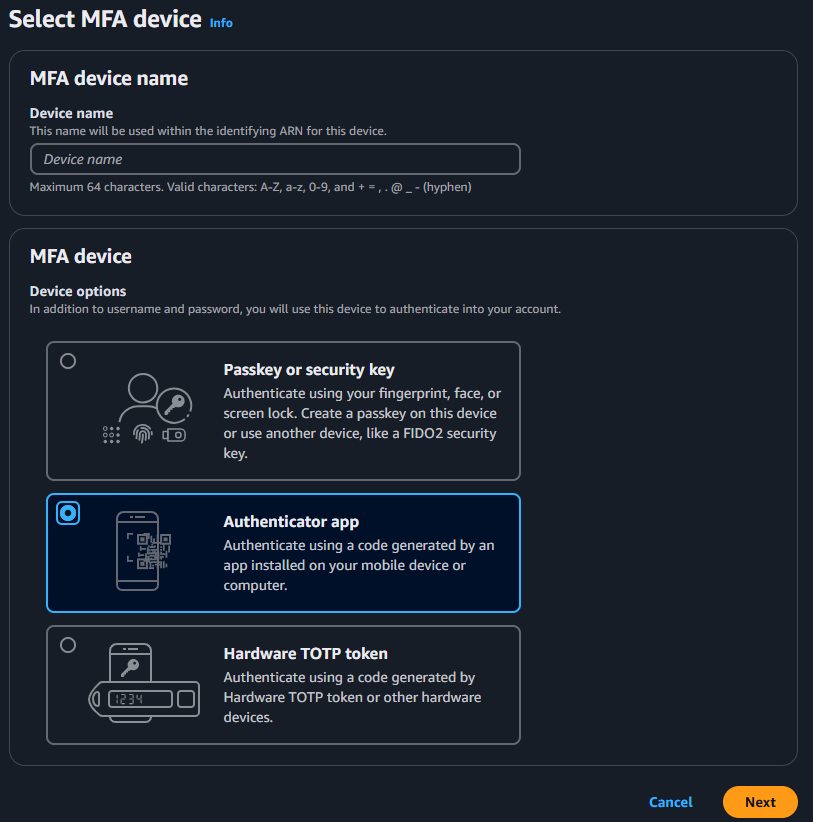
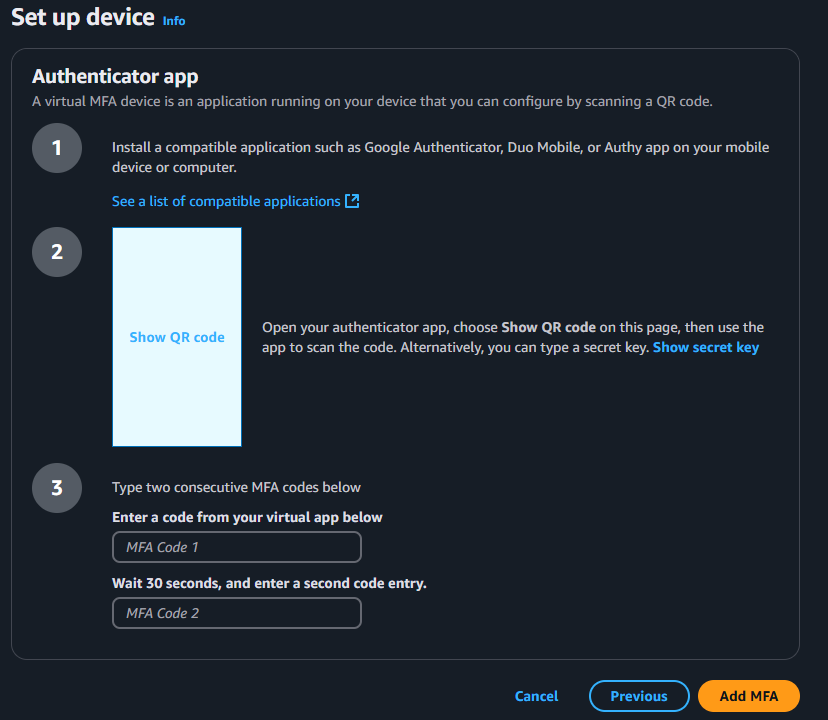
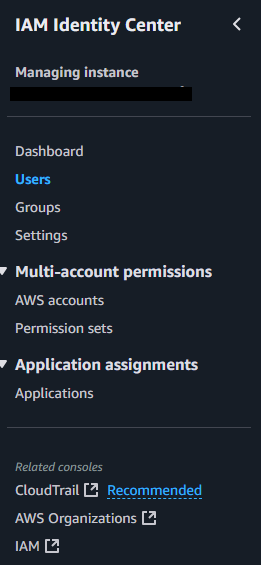
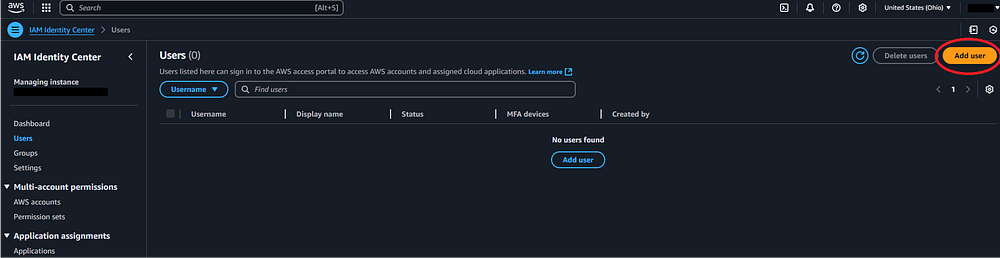
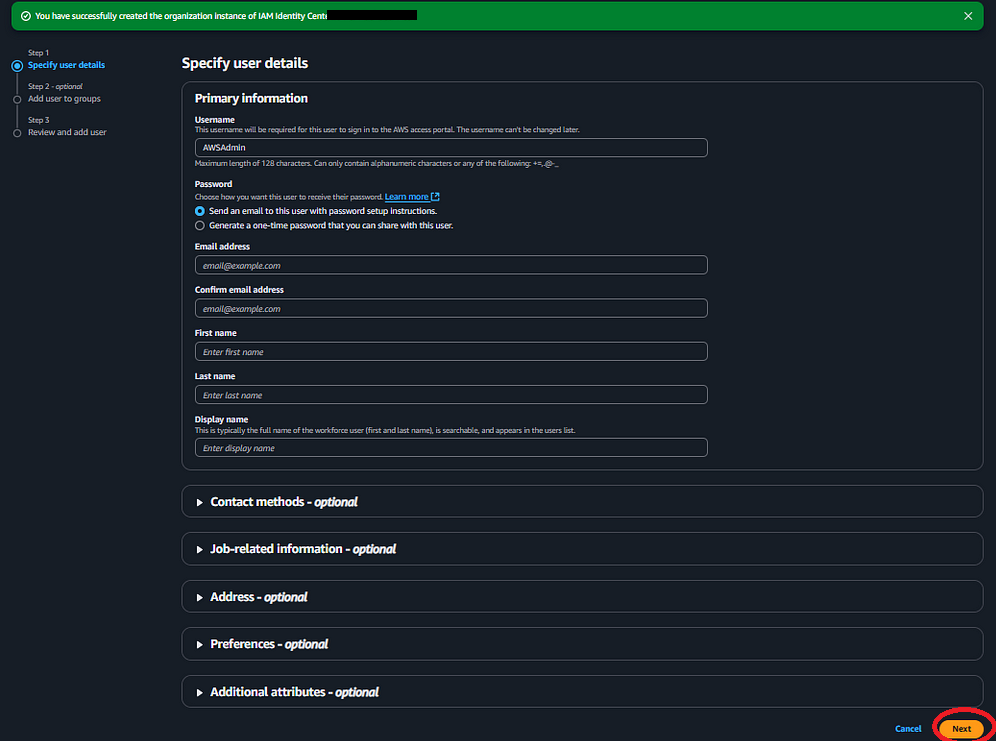
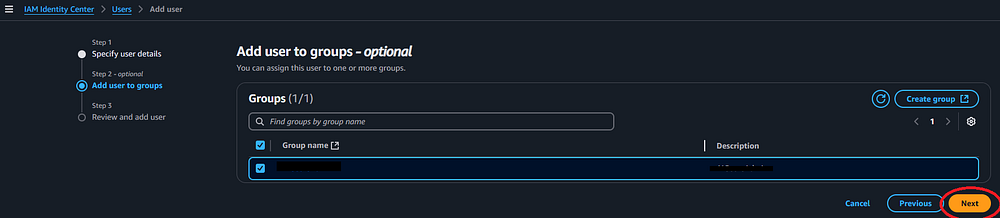
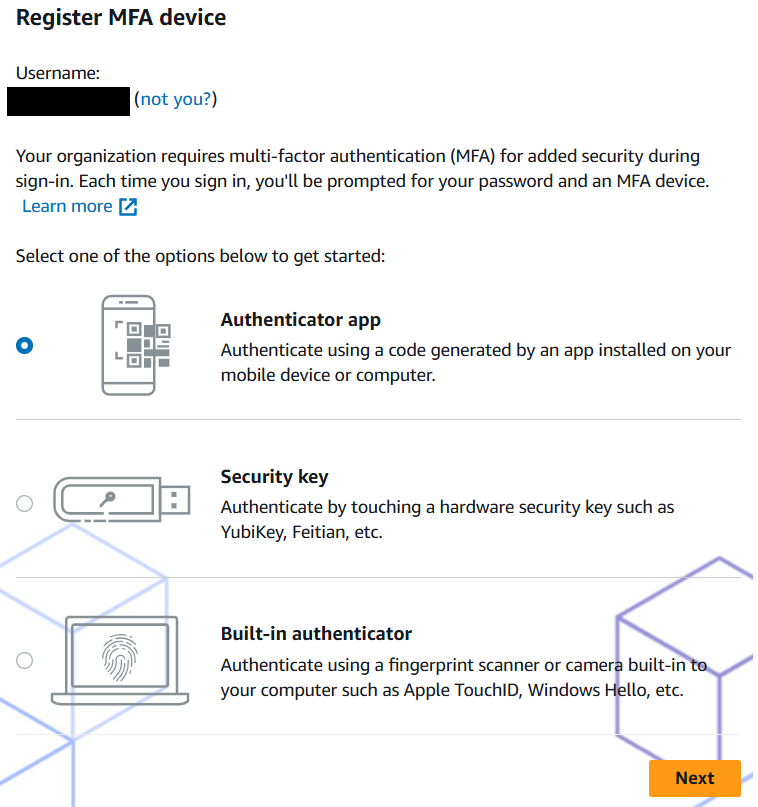
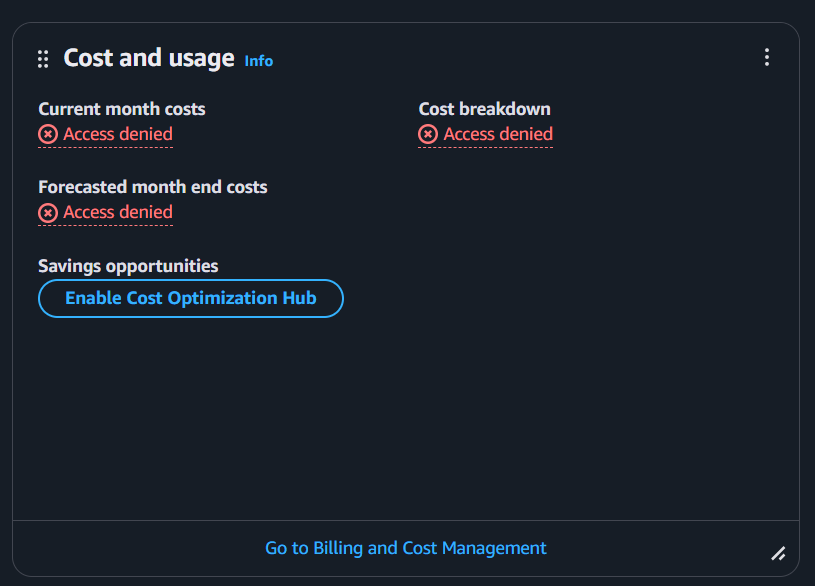
Step 16: While the AWS Account is now set up and working, there are a few other tasks
that should be done immediately. First, two-factor authentication should be enabled for
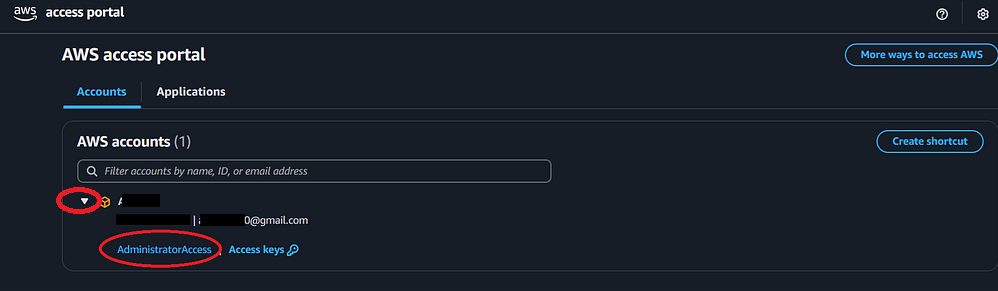
the root account to increase security. Second, an admin (non-root) AWS Account should be
created and two-factor authentication should be enabled for this account. Logging into AWS
with the root account is not recommended, so make a second account for daily use ASAP.
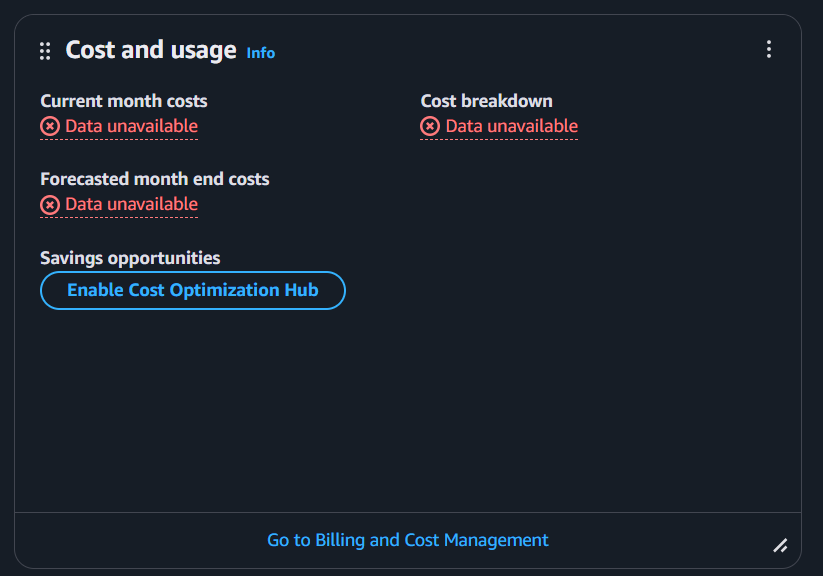
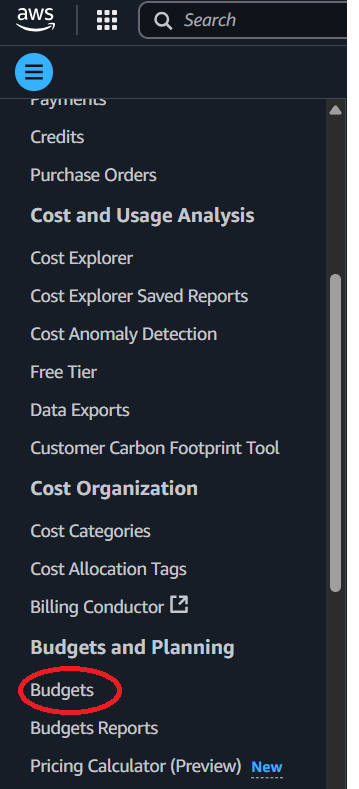
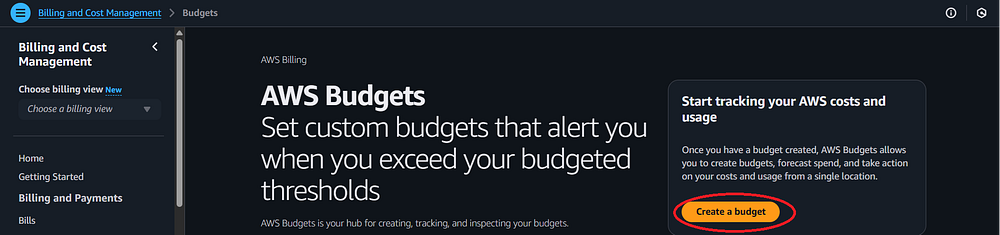
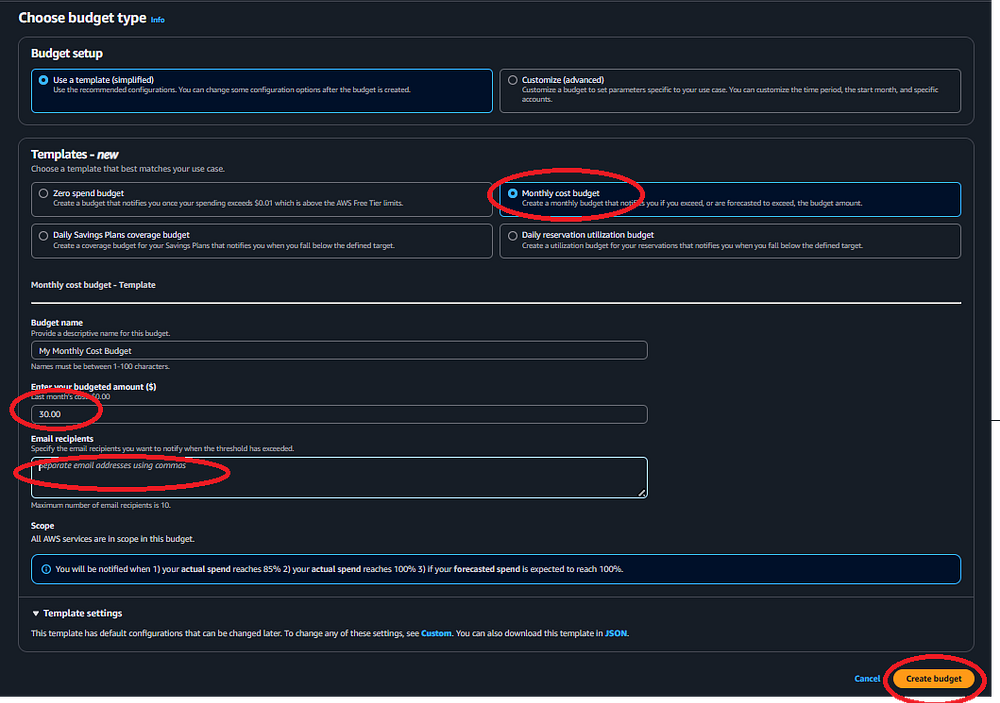
Third, billing alarms should be set up to reduce the risk that charges go undetected for
an extended period of time. The steps in the sub-sections below will cover these tasks.
Please do your future self a favor and complete these steps now, before you start creating
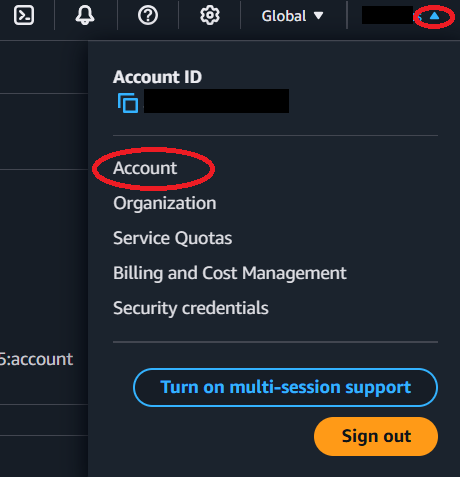
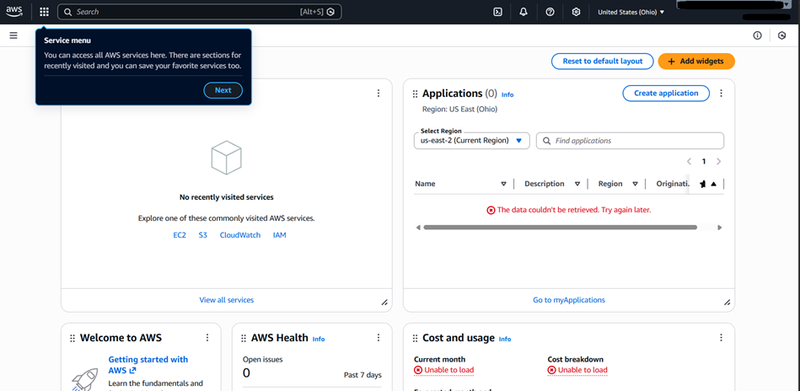
services in AWS! If you prefer dark mode, as is the case with author, you can click on the
account name in the top right of the screen, click "Settings," and choose "Dark."
See the screenshot below for reference.
Sub-Section - Enable Two Factor Authentication:
Step 17: On the top right portion of the screen, you should see the name of the account,
which is the name you provided when you set it up. Click the drop down arrow, and you should
see an option called "Security Credentials." Click this option. Note that while you are on
this screen, you may want to make a note of your Account ID and store that number in a secure
location as you may need this information later.
Step 18: On the "Security Credentials" screen, you should see a prompt indicating that
you do not have Two Factor authentication set up. Click the "Assign MFA" prompt to begin
the process.
Step 19: Enter a device name that will allow you to track this MFA device. If you have
multiple accounts on your MFA application, choose a name you can recognize, as you will need
to enter this code later to access your AWS account. Choose an option for MFA. For the
purposes of this article, we will use the "Authenticator app" option. Click "Next."
Step 20: On the screen, you will need to click the "Show QR Code" option and scan
that code with the MFA software application on your phone. There are multiple MFA software
options, the author uses Microsoft Authenticator, but there are others. Note that adding
a new entry to the MFA software varies, so please follow the guidelines provided by your
MFA software vendor. Once you add the entry to your MFA application, you should enter the
codes that show up in the "MFA Code 1" and "MFA Code 2" boxes on the AWS Console screen.
Note that it may take 30 seconds for the MFA application to "refresh" and provide a new
MFA number. Once you have entered both numbers, press the "Add MFA" button.
Step 21: You should be taken back to the Security Credential screen and see a
green banner similar to the one below if this was successful.
Step 22: Note that the next time you want to sign into this account, you will need
to choose the "Sign in using root user email" option.
Step 23: You can now enter the root user email. Click "Next."
Step 24: You will then be taken to another screen to enter your root user password.
Click "Sign in."
Step 25: Finally, you will be taken to a third screen to enter your MFA code.
You can now sign into your root account. Click "Submit."
Sub-Section - Setting up a second (non-root user) administrator account:
Step 26: As discussed previously, you should not use the root AWS account for day
to day work. Instead, you should create and administrator (admin) account and use it.
If you have not done so, log into your root account (see above). Once in, use the search
box on the top right and type "IAM." This will bring up a list of IAM services.
Click on the "IAM Identity Center" service to navigate to the service page. Note: it is
recommended that user access be managed in IAM Identity Center. If you go to "IAM",
click on "Users," and add a new user, you will be prompted to use IAM Identity Center.
If you follow that prompt, you will end up in the "IAM Identity Center" service.
Step 27: If you have never enabled AWS Identity Center, you will be asked to enable it.
Click the "Enable" button on the right side of the screen.
Step 28: You will be asked to confirm some information. The author used the
defaults provided below. Click "Enable."
Step 29: You should be taken to the Identity Center Dashboard, now that you have
activated it. On the left hand side of the screen, navigate to "Users" to create a new admin
user.
Step 30: As this is a new AWS account, there should not be any users present.
Before we add a new user, there are a few other things we need to set up.
First, we need a Permission Set. Click on the "Permission sets" option on the left side
of the screen.
Step 31: Assuming you have not yet created a permission set, click on the "Create
permission set" option.
Step 32: If not already chosen, pick the "Predefined permission set" and choose
"AdministratorAccess" for the AWS managed policy, then click "Next."
Step 33: You can leave the default name or change it. You can enter a description
(the author copied the default name). You can leave the default session duration or change it;
the author made it 12 hours. Click "Next."
Step 34: Review your configuration and click "Create."
Step 35: Now that the Permission Set is created, we can create an Admin group that
uses it. Click on the "Groups" option on the left side of the screen.
Step 36: Assuming you have not created any Groups yet, you should see the IAM Identity
Center Groups screen with no groups. Click the "Create Group" button.
Step 37: Enter a group name and description. In this case, it will be an "Admin"
Group that will be associated with the AWS Account Name entered above. The author used
the format AWS Account Name entered above appended with "Admin" but you can use something
more descriptive as needed so you know what the group is for. Click the "Create Group" button.
Step 38: With the Group and Permission set created, we can now Associate the AWS Account
(the name created in Step 2) with both of these objects. Click the "AWS accounts" option on the
left side of the screen.
Step 39: You should select the check box for your AWS account. Note the author has
covered some information in the screenshot below. Once you select that checkbox,
click the "Assign Users or Groups"
button.
Step 40: Ensuring the "Groups" tab is selected, choose the group you created in the
steps above. Click "Next."
Step 41: Select the "AdministratorAccess" permission set and click "Next."
Step 42: Review the options and click "Submit."
Step 43: You should get a success message indicating the changes have been made.
You can now select "Users" from the left side navigation panel and create a user.
Step 44: If you have not added any users, there will not be any yet.
Click the "Add User" button on the right side of the screen to add a new user.
Step 45: Fill out the form to add a new user. The author used the username format of the
AWS Account Name entered in Step 2 above appended with "Admin" but you can use something more
descriptive as needed so you know what the account is for. You will need to fill in the
first and last name fields. The author used AWS Account Name for the first name, and the
word "Admin" for the last name. This will auto-populate the "Display Name" field, which you
can modify if needed. You can also enter actual first name, last name, email, and other such
information if you like. You can fill in the optional information as needed, the author
did not do so. Note you can either send an email with password setup instructions,
or have AWS create a one-time password you can use to log into the account, which you will
then need to change. The author used the "generate a one time password" option.
Click the "Next" button at the bottom right of the screen when done.
Step 46: You will be prompted to add this user to a group. Choose the Admin group
you made in the steps above. Click "Next."
Step 47: Review your changes and click "Add User."
Step 48: You should be prompted with a screen that includes a URL, a username, and
a one-time password. You can use this information to log into the AWS console.
Please make a note of this information, you will need it in the future, so put it somewhere safe.
Step 49: Navigate to the URL provided. You should see a screen to enter the Username
you just created. Enter the username and click "Next."
Step 50: You can now enter the temporary password AWS supplied you with. Click "Sign In."
Step 51: You will be prompted to set up MFA. See the steps above on how to do this.
Step 52: Once your MFA is set up, you will need to change the initial password you
were given. Enter a new password and click "Set new password."
Step 53: You will then be redirected to the sign in page. You will need to re-enter
your username, then the new password, and finally your MFA authenticator. Click "Next."
Step 54: You should now see the AWS access portal page. It should show your AWS account,
and if you click the arrow to the right of the account name, a drop down appears with two
options "AdministratorAccess" and "Access Keys." Click the "Administrator Access" option,
and you will be signed into the AWS Console.
Step 55: You should now see the AWS Console Home. Note you can click the drop down on
the AdministratorAccess section on the top right of the screen and see details such as your
account ID and that you are now a Federated User. You can bookmark the URL you used to sign
in to make future sign in easier. As per previous notes, you should use this account,
not the "root" account, for day to day work in AWS.
Sub-Section - Setting up a Billing Alarm:
Step 56: Before you start creating services in AWS, you should set up a billing alarm.
This is just as important as MFA; unless you have lots of money to burn, you do not want to log
into your AWS account at the end of the month and find a huge bill waiting for you because of a
surprise service charge. When you log into the AWS Console using the newly created
Administrator account, you might notice that the "Cost and Usage" widget is showing
"Access Denied" (see the screenshot below). This is because, by default, Administrator
permissions do not allow access to certain functions, including billing. You need to log in
as the "root" account and explicitly provide billing access to the Administrator account.
Step 57: Sign out of AWS with the Administrator account and sign back in using the
"root" account; please see the steps above on how to do this if needed. Once you are
signed in as the root account, click the drop down arrow on the top right of the screen by
the Account Name and choose the "Account" option.
Step 58: This will bring you to the root account configuration screen. Scroll down until
you see the option called "IAM user and role access to Billing information" and click the
"Edit" button.
Step 59: Check the "Activate IAM Access" box and click the "Update" button.
Step 60: The console should show that this has been activated.
Step 61: If you sign out of the "root" account and sign back in to the Admin account,
you should see a change in the "Cost and Usage" widget. While the data may not be available
(it takes time after setting up a new account for these fields to populate), you no longer see
the "Access Denied" error.
Step 62: If you type the word "billing" into the search box on the top left of the
screen, you should see an option for "Billing and Cost Management." Click that option.
Step 63: On the right side of the screen, in the navigation section, click the
option that says "Budgets."
Step 64: Unless you have set up a Budget for this account before, you should see a
button called "Create a budget." Click it.
Step 65: Set up a budget. The author is using a template (vs a customized budget) and
the "Monthly cost budget" option for a $30 / month spend alarm. You should enter any email
addresses you want to receive alerts to. These may be email addresses that differ from the
email address you used for your "root" or user accounts. When done, click "Create budget."
Step 66: You should see a screen confirming that your budget was created. Note that
while Budgets are designed to protect you from overspending, they are not a perfect solution.
There may be a delay between when an event occurs that triggers a cost, and when the budget
alarm notifies you. As always, proceed with caution.
Step 67: This completes the AWS Account setup process. With the AWS Account set up,
you can now follow the Step By Step guides that use AWS Services to deliver working solutions,
such as creating a static website. These guides can be found in the main
Step By Step Guides page. Note: it is reccomended that you connect Visual
Studio Code with your AWS Account using the AWS Toolkit.
Please see the Step By Step - Connect Visual Studio Code to AWS
guide for more infromation.