-
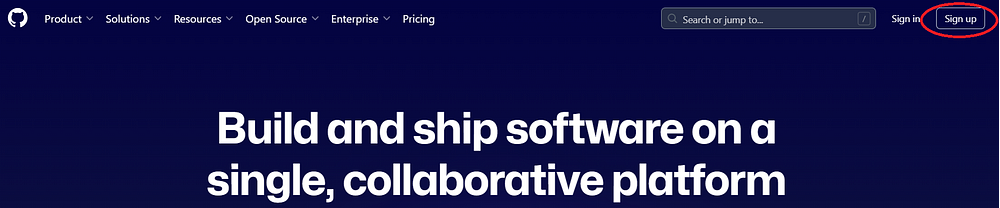
Step 1: Navigate to GitHub and choose "Sign up."
-
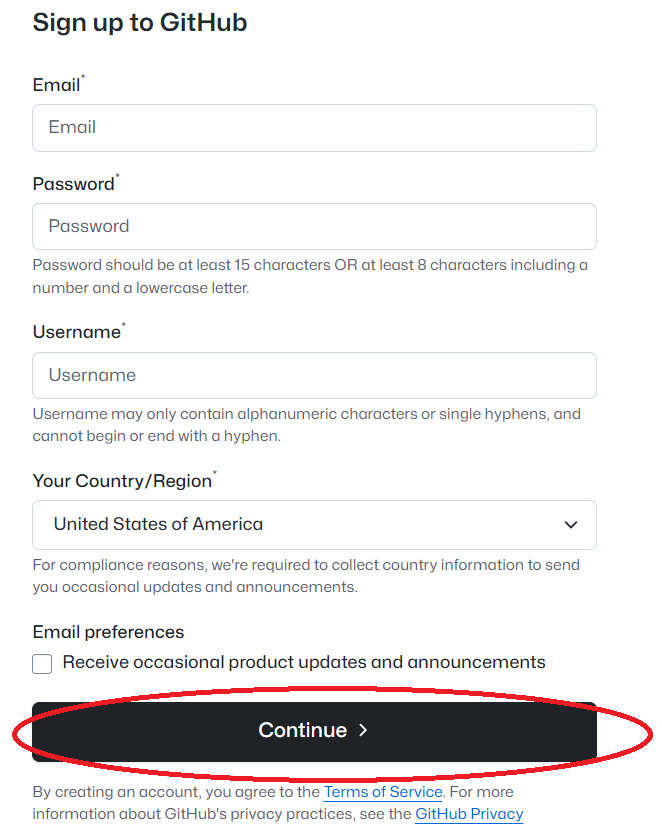
Step 2: Fill in the form with your email address, a password, and a username. Click the
"Continue" button when done.
-
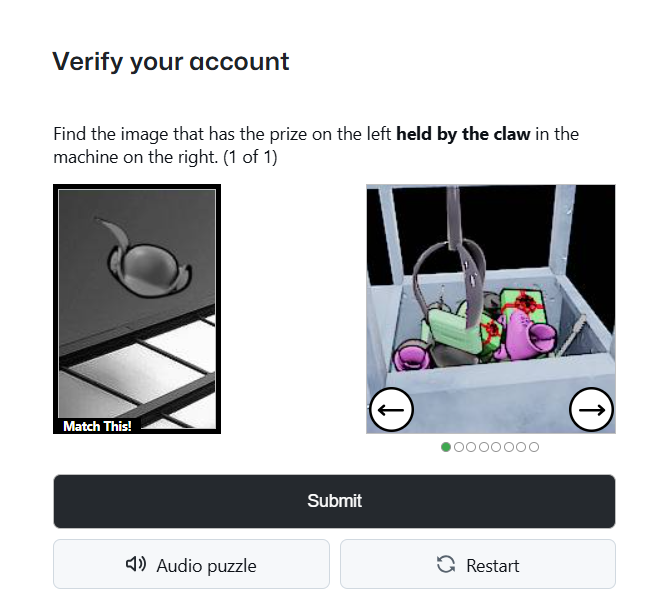
Step 3: You will need to solve a visual or audio puzzle to proceed. The author chose
the visual puzzle.
-
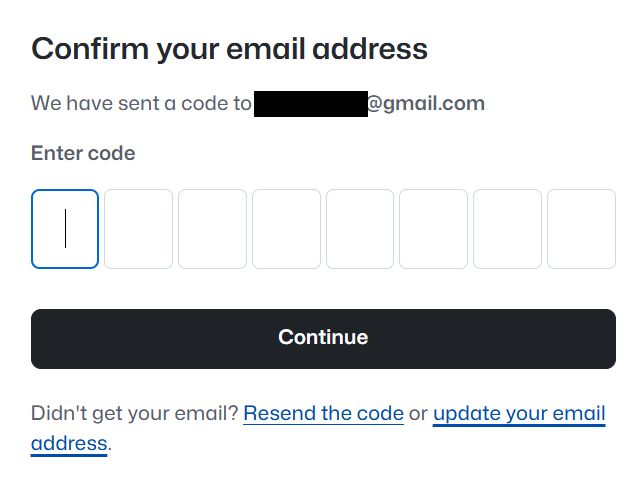
Step 4: You will need to check the email account you used in the step above and enter
the code you were sent. Click "Continue" when done. You may be automatically redirected to
the sign in screen below after you enter the code even if you don't click the "Continue" button.
-
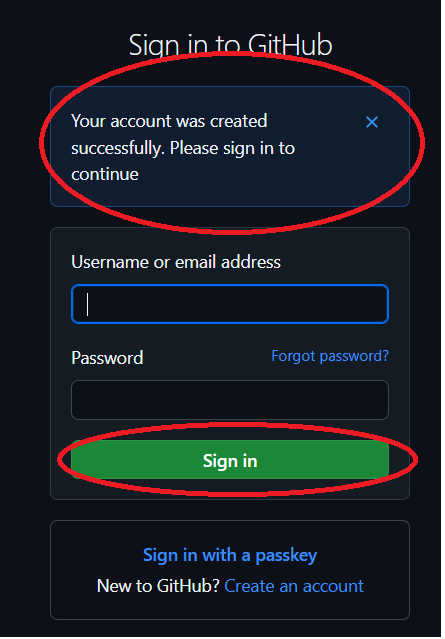
Step 5: You should see a message indicating your account was created. You will need
to enter your username or email address and your password and click the "Sign in" button.
-
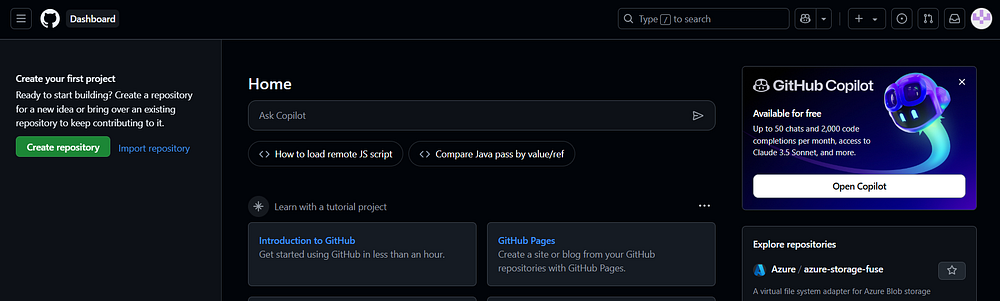
Step 6: You should now be signed into your new GitHub account.
-
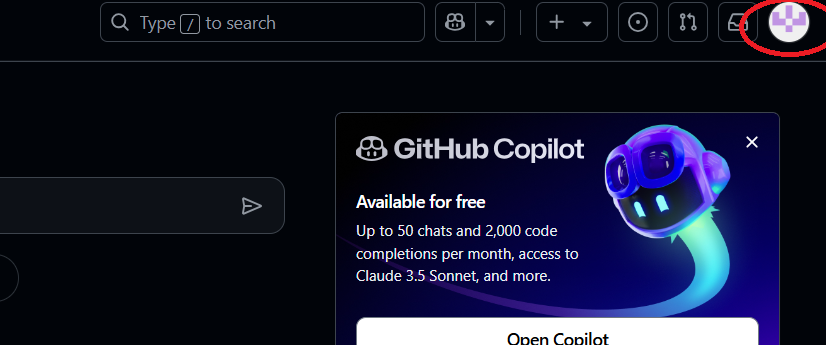
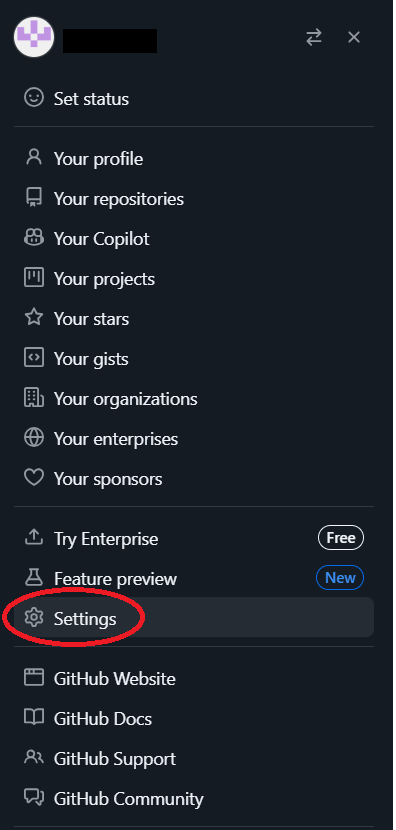
Step 7: For security purposes, you should enable Two Factor Authentication for you GitHub
account immedietly. Click the icon on the top right of the screen to access the account settings.
-
Step 8: On the drop down menu that appears, choose "Settings."
-
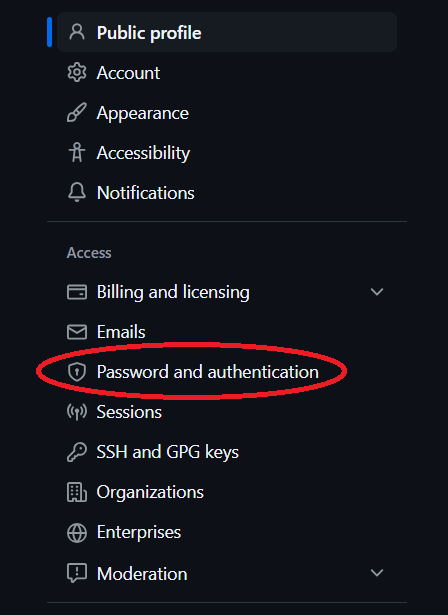
Step 9: On the left hand menu bar, select the "Password and authentication" option.
-
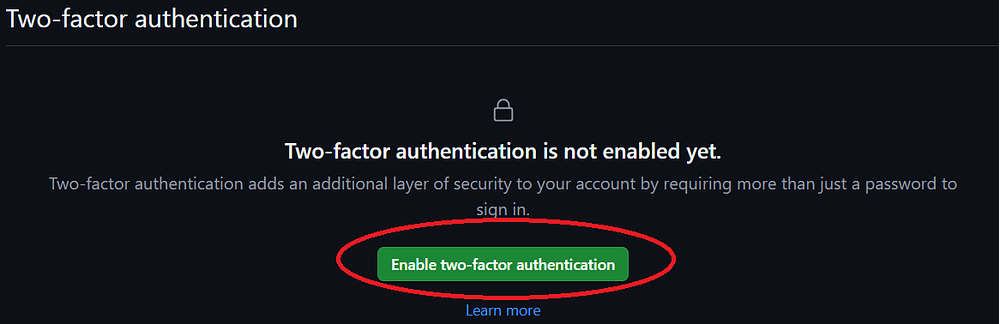
Step 10: Scroll down on the main screen until you see the "Two-factor authentication"
section. Click the "Enable two-factor authentication" button.
-
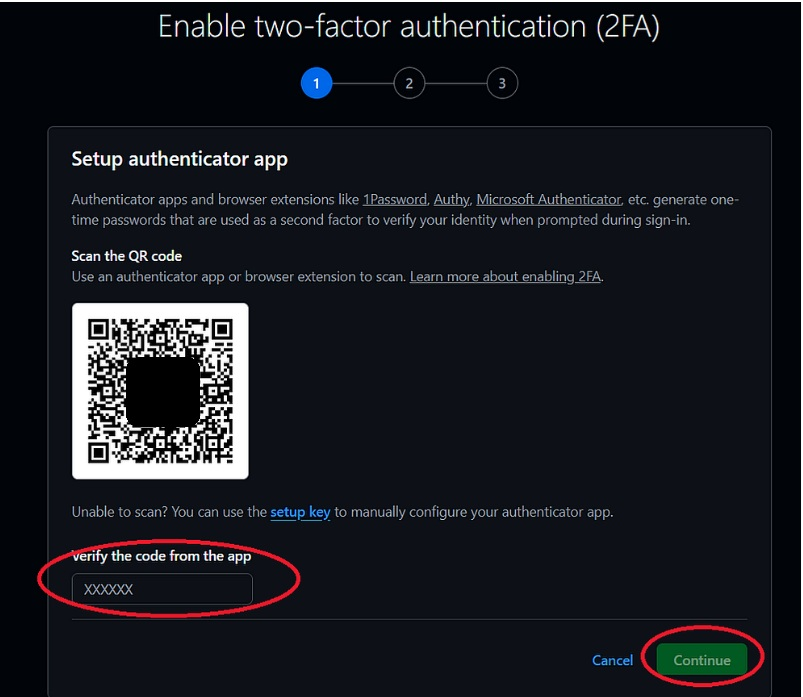
Step 11: You will be prompted with an option to scan a QR Code which will add a new
entry to the authenticator on your mobile phone. The author uses Microsoft Authenticator.
Please refer to your authenticator application for more information on how to add a new account.
If you use Microsoft Authenticator, it will add the account as GitHub and show the account name
you entered in the previous step. This allows you to keep your GitHub accounts separate if you
have more than one GitHub account with two factor authentication enabled on the same
Authenticator application. Once your authenticator app is working, enter the code from
the application in the box that says "Verify the code from the app" and click "Continue."
Note that GitHub also allows for SMS Two-Factor authentication as an option at the bottom
of the screen if you do not want to use an authenticator application.
-
Step 12: Note that you may be automatically redirected to the screen in the image below
after entering the authenticator code, even if you do not press the "Continue" button.
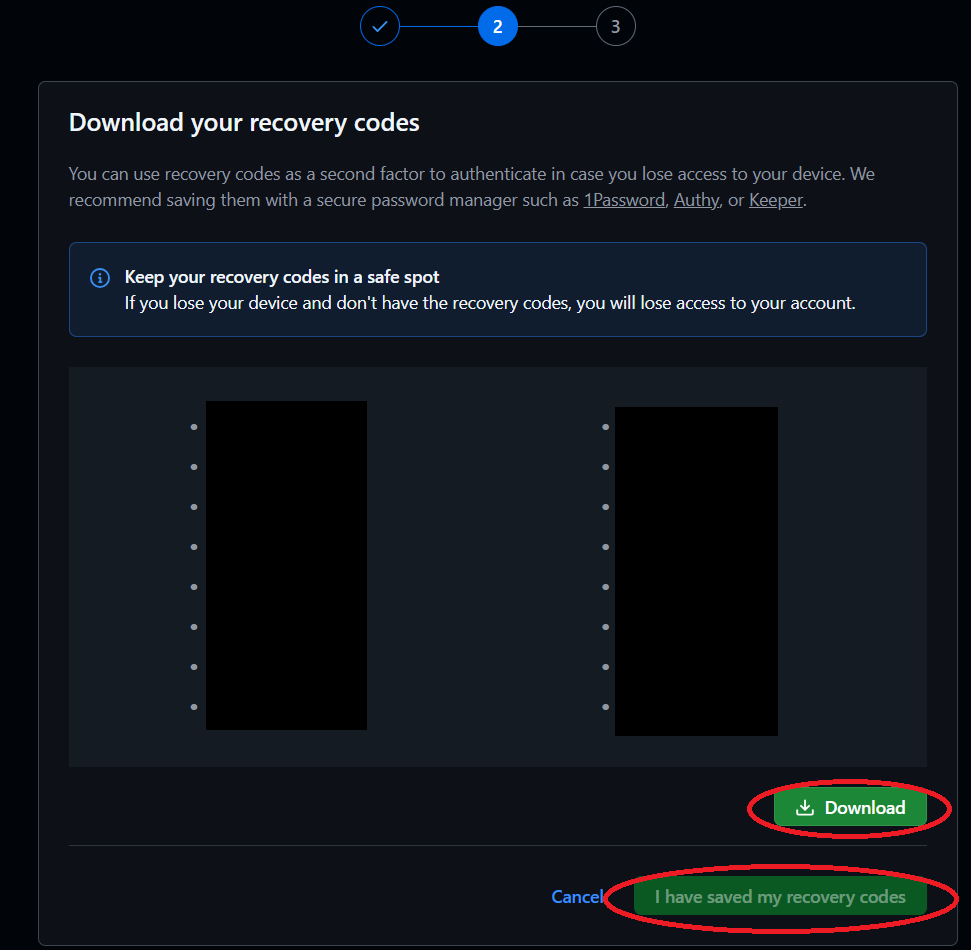
You will be presented with a list of recovery codes. Please keep these in a safe location as
you may need them to access your GitHub account in the event that your authenticator is
unavailable. Note that you need to click the "Download" button to unlock the "I have saved
my recovery codes" button to proceed. You should receive an email indicating the need to
download the recovery codes.
-
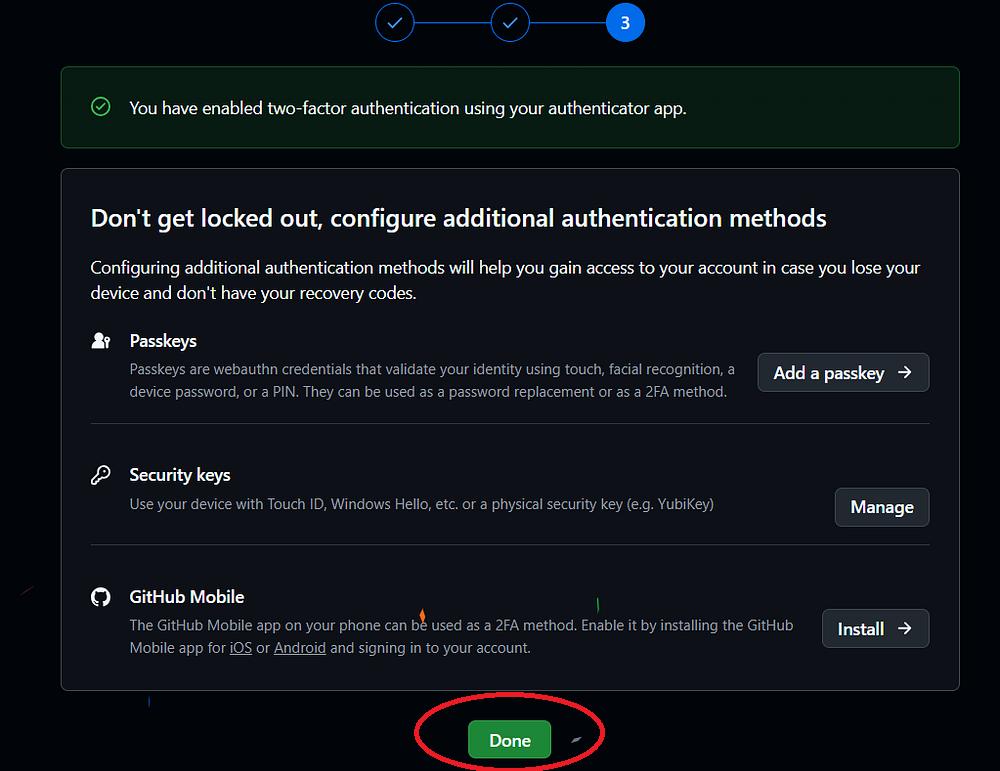
Step 13: You have now enabled two factor authentication for your GitHub account.
You should see a confirmation screen similar to the one below that provides additional
options if you wish to enable them. Click "Done" to proceed.
-
Step 14: You now need to create a repository. Some users may want to make their GitHub
Repositories public, other users (including the author) may want to keep their Repositories
private. Please note that future step-by-step guides (such as how to connect Visual Studio
Code to GitHub) assume you have set your GitHub Repository to private per the instructions
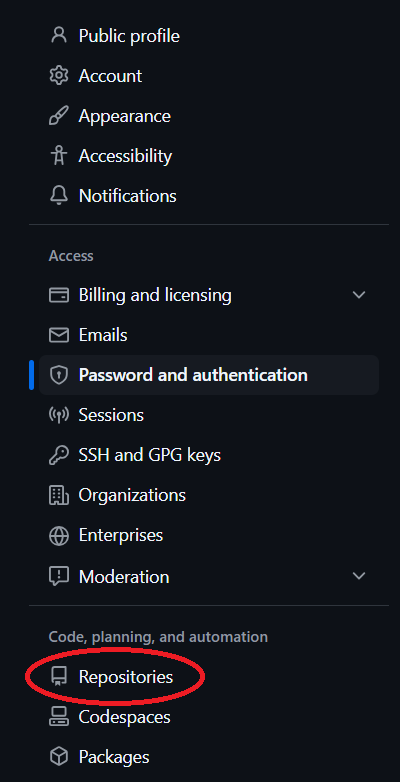
in this section. When you click the "Done" button above, you should be taken back to the
"Settings" screen. Click the "Repositories" option on the left menu.
-
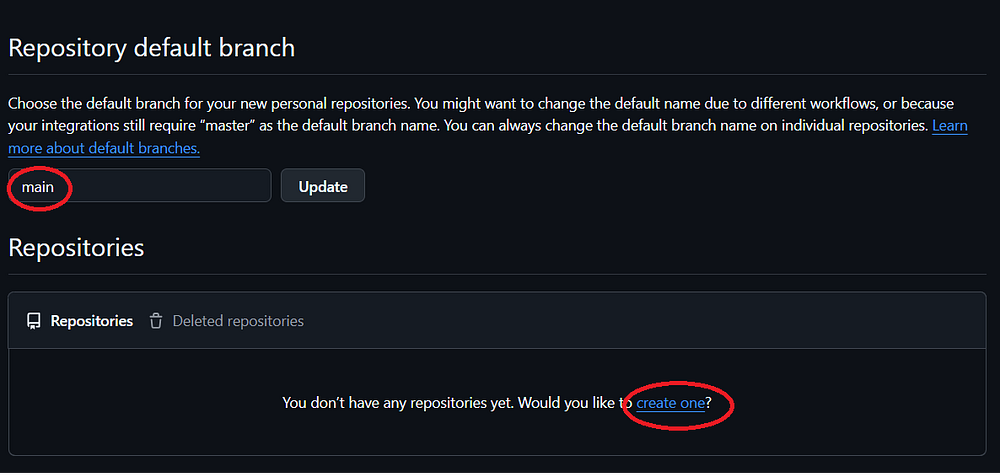
Step 15: You should see a screen that shows you do not currently have any repositories,
unless you have previously made one. There is an option to create a new repository.
Click the "create one" link. Note the author is using the default "main" branch name.
-
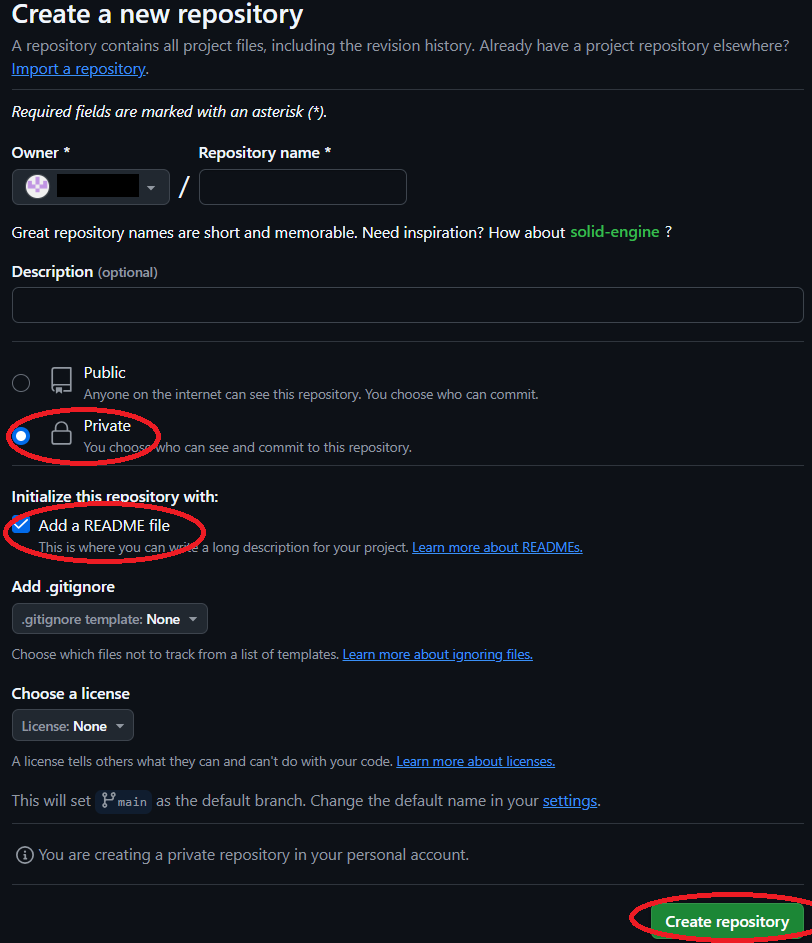
Step 16: Enter a name for your repository. Note the default owner is the GitHub account
you created. Select the "private" option and select the "Add a README file" option.
Note it is a best practice to add a README file. You can select options for "gitignore" if
this applies to you. The author did not configure a gitignore template. You can choos a license
if this applies to you. The author did not do so. Click the "Create repository" button.
-
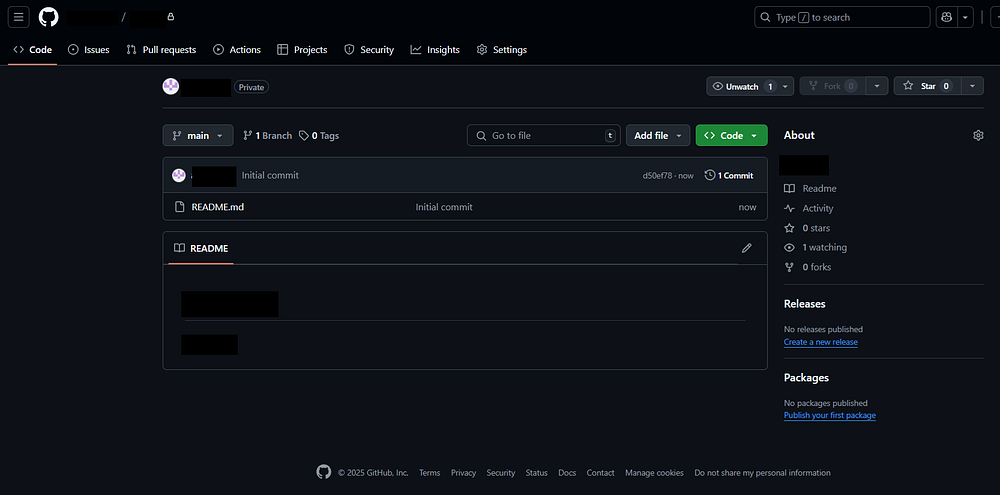
Step 17: You should see a screen showing your newly created repository. Note the author
has blocked out the name of the repository and account for security purposes. Now that you have
created a private repository, you can move on to the next step by step guide:
Step By Step - Install Visual Studio Code.